
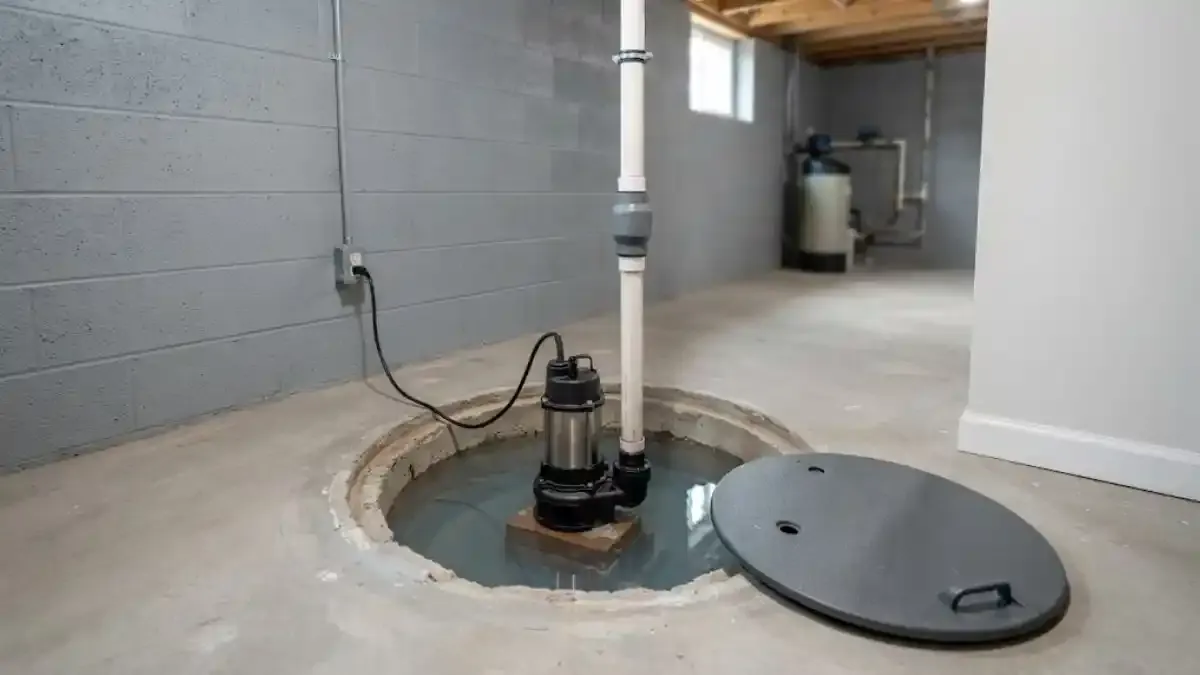
Sump pump cover installation means fitting a lid over the pit so the pump sits under a closed cover instead of an open hole in the floor. The lid has cutouts for the discharge pipe and power cord, and a gasket or caulk seals the rim. A sealed cover keeps debris out, cuts humidity and odor, and keeps kids and pets away from the pit.
In an Erlanger, KY basement, most lids can be fitted in under an hour once the pump is checked. The catch is the work that comes first. A lid hides a pump that is failing, so test it before you close the pit.
What a lid on the pit actually changes
An open pit lets in everything that falls, drifts or gets kicked toward it. A cover stops that. It also reduces the damp air that rises from the water in the pit, which matters if the basement already feels clammy or if you store boxes nearby.
A sealed lid helps with sound and smell too. Pump motors and the splash of water refilling the pit are quieter with a lid in place, and a musty odor from standing water is held in the pit instead of drifting through the room.
A note on radon and soil gas
Soil gas can enter a house through an open pit. If you have a radon test result you are concerned about, a gasketed lid is one of the pieces a mitigation contractor looks at. A lid alone is not a fix, and a test kit is the only way to know your own level.
Sealed lid or simple loose cover
Lids range from a loose plastic disc to a gasketed cover held down with bolts. The right one depends on what you need it to do.
Sealed gasketed lid
- Bolts or screws hold it tight against a rubber gasket
- Cutouts or grommets fit the pipe and cord closely
- Cuts humidity, odor and noise the most
- A clear window lets you check the float without removing it
- Takes longer to remove for pump service
Simple loose cover
- Rests on the pit rim with no seal
- Keeps out larger debris and curious hands
- Easy to lift for a quick look
- Does little for humidity or soil gas
- Fine for a dry pit that is only a trip hazard
Most homeowners with a damp basement or a radon concern end up choosing the sealed type.
Check these things before the lid goes on
Once the cover is sealed, small problems get harder to see. Go through this list first.
- Pour a bucket of water into the pit and confirm the pump starts and empties it
- Make sure the float moves freely and does not rub the pit wall
- Look for a check valve on the discharge pipe above the pump
- Confirm the discharge pipe leaves the house and drains away from the foundation
- Check that the power cord has slack and plugs into its own outlet
- Remove silt, gravel or debris from the bottom of the pit
- Find the small vent hole in the discharge pipe below the check valve and keep it clear
Banklick Creek, SD1 and what they mean for your pit
SD1's Banklick Creek watershed report covers 58.2 square miles in Kenton and Boone counties and lists Erlanger among its developed communities. It says flooding has been a recurring problem there, and Doe Run Lake was built in 1982 to help control it. That is a reason to treat a working sump pump as basic equipment, and to test yours before you close it under a lid.
SD1's published Backup Assistance Program policy is about sewer backups, not groundwater in a sump pit, and it has strict rules about who qualifies. Confirm current terms with SD1 before assuming anything applies. The practical point is that a sump pump and a sewer backup device solve different problems, so ask a plumber which one your house needs.
Under Kentucky's 815 KAR 20:050, new plumbing, moved fixtures and new drain openings need a permit. Ask whoever does the work whether the job touches the discharge or any drain connection, since that decides whether paperwork is needed.
Source type: SD1 watershed document, SD1 published policy, Kentucky 815 KAR 20:050
How the cover goes on, step by step
The sequence is simple, but each step affects the seal.
- 1
Measure the pit opening
Measure across the rim at the widest and narrowest points. Pits are round, square or tapered, so measure the actual opening, not the pump.
- 2
Mark the pipe and cord positions
Hold the lid in place and mark where the discharge pipe, power cord and any alarm lead cross the rim. These become the cutouts.
- 3
Cut or choose the openings
Many lids come with pre-cut grommet holes. A lid that needs cutting should be trimmed slightly small, then fitted until it seats flat.
- 4
Set the gasket or seal
Clean the rim and apply the gasket or a bead of sealant. A dirty or cracked rim will leak air no matter how good the lid is.
- 5
Fasten and test
Tighten the lid evenly, then repeat the water test. Listen for the pump to cycle and watch that the float clears the cover.
Problems a cover can cause if the details are missed
A lid should never make the pump work harder. These are the usual traps.
| Detail missed | What you notice | What fixes it |
|---|---|---|
| Float hits the underside of the lid | Pump runs constantly or never starts | Move the pump or use a lower lid |
| No vent hole in the discharge | Pump runs but moves no water | Drill a small relief hole below the check valve |
| Cord pinched at the rim | Tripped breaker or frayed insulation | Re-route cord through a grommet |
| Lid not sealed around the pipe | Damp smell remains | Reseat grommet or add sealant |
| Check valve missing | Water falls back into the pit and cycles the pump | Add a check valve |
None of these are hard to fix, but all are easier to catch before the lid is bolted down.
Doing it yourself and when to bring in a plumber
A homeowner who is comfortable with basic tools can fit a standard lid on a pump that already works. Measure, cut, seal and test. If the pump is old, the float sticks, or there is no check valve, the better move is to have the pump itself looked at first.
A plumber handling sump pump repair and installation can swap the pump, add a check valve, set a battery backup and fit the cover in one visit. If dampness keeps returning, the underlying cause may be outside the pit, and basement waterproofing is the next conversation.
Quick Answers on Sump pump cover installation
It is not a requirement in every case, but a cover helps. It keeps debris out of the pump, reduces damp air, and stops small children and pets from reaching the pit. A sealed cover is more useful if the basement smells musty.
Only if it is fitted badly. A float that hits the lid, a pinched cord, or a discharge pipe with no relief hole can keep the pump from working. Test the pump with a bucket of water after the lid is on.
No. A gasketed lid helps limit soil gas coming through the pit, but radon reduction usually involves more than one step. A test kit tells you your level, and a mitigation contractor decides what to do.
Fitting a standard lid on a working pump usually takes under an hour. Add time if the pump needs replacing, a check valve is missing, or the pit needs cleaning out first.
Yes, the plumbers serve Florence and Fort Mitchell as well as Erlanger and nearby towns. Tell the dispatcher the pit size and whether the pump has been working, so the visit is planned well.