
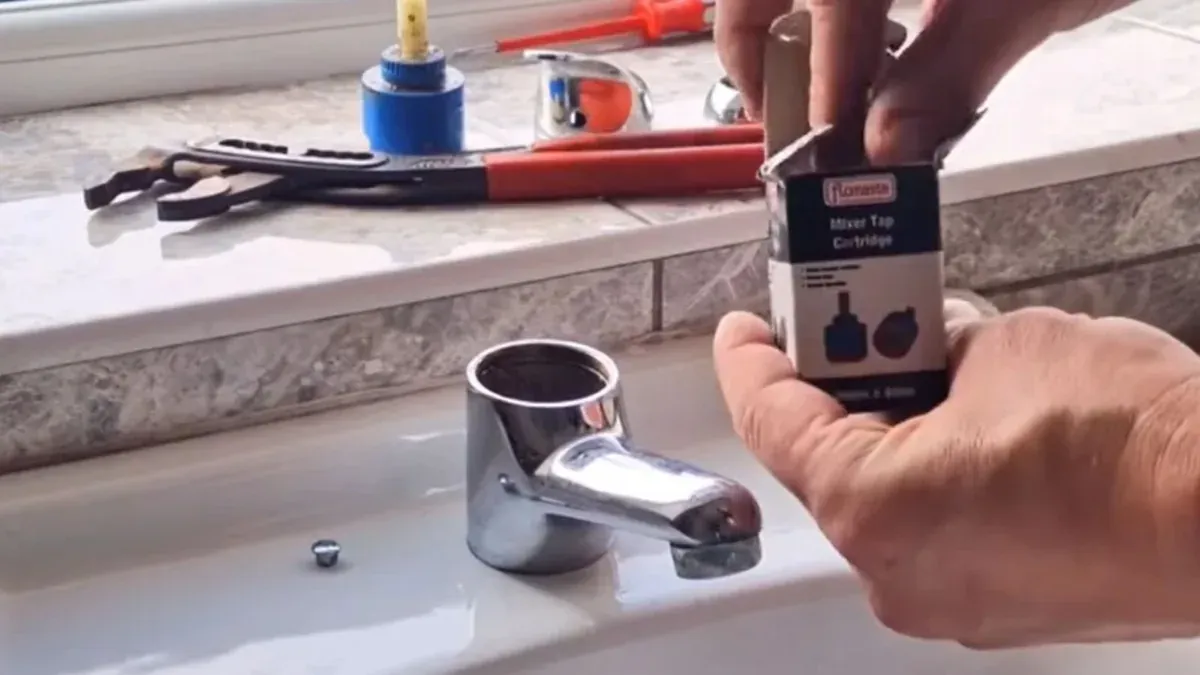
A dripping faucet is almost always a worn internal part: a rubber washer, an O-ring, a seat or a cartridge. To repair it, shut off the water under the sink, take the handle apart, replace the worn part with an exact match, and reassemble. The hard part is knowing which kind of faucet you have.
Below is a way to identify your faucet, a short list of tools, a repair routine, and the point where a plumber is the better call. A steady drip is cheap to ignore for a week, but water wasted adds up, and a slow leak under the sink can rot a cabinet.
Four faucet designs and how each one drips
The repair depends entirely on the internal design. Remove the handle and look before you buy any parts.
Compression faucet
Two separate handles that you turn several times. Drips usually mean a worn rubber washer or a pitted seat.
Cartridge faucet
One or two handles that lift or move smoothly. A drip at the spout points to a worn cartridge or its O-rings.
Ball faucet
A single handle over a rounded cap, common on kitchen sinks. Leaks come from worn seats, springs or the cam.
Ceramic disc faucet
A single lever with a wide cylinder body. Drips are rare, and usually mean the seals or the disc set need replacing.
What to gather before you start
A full set of tools on the counter avoids a second trip to the store with a half-taken-apart faucet.
- Adjustable wrench and a set of screwdrivers
- Allen keys for set screws under the handle cap
- Replacement washers, O-rings or a matching cartridge
- Plumber's grease for new rubber parts
- A rag in the drain to catch small screws
- A flashlight and a towel for the cabinet floor
- Your phone for photos of each step as you go
A basic drip repair, start to finish
This routine fits most sink faucets. Slow down at the disassembly stage and set parts down in order.
- 1
Shut off the supply
Close the small valves under the sink by turning them clockwise. Open the faucet to drain pressure and confirm the water has stopped.
- 2
Remove the handle
Pry off the decorative cap, then remove the screw or loosen the set screw. Lift the handle off and note how it sits.
- 3
Pull the stem or cartridge
Unscrew the retaining nut with a wrench. Wrap tape on the nut so the finish does not scar.
- 4
Inspect and replace the worn part
Look for cracked rubber, scratches or mineral crust. Take the old part to the store and match it exactly.
- 5
Reassemble and test
Put everything back in reverse order, open the supply valves slowly, then run the faucet and check for drips under the sink.
Reading your water bill and knowing the permit rule
The EPA's WaterSense program says household leaks can waste nearly 10,000 gallons of water a year. A single dripping faucet is a small piece of that, but your water bill is where it shows. Check your bill to confirm your supplier, compare a few months, and use that as a prompt to fix drips promptly.
Kentucky's 815 KAR 20:050 says no plumbing permit is required for repairing leaks, cocks or valves. That covers a washer or cartridge swap. Moving a fixture or adding new supply and drain openings is different, so ask a licensed plumber before you change where anything connects.
Erlanger's housing units rose from 6,865 in 2000 to 8,249 in 2020, so many fixtures around town have been replaced at least once. A faucet from the 1970s is likely to use different parts from one installed recently, so identify yours before shopping. Neighbors in Elsmere and Edgewood run into the same part-matching problem.
Source type: EPA WaterSense leak figures, Kentucky 815 KAR 20:050, City of Erlanger housing data
Where the drip shows up and what it means
The spot where water appears is the best clue to the failed part. Use the table as a quick triage.
| Where it leaks | Likely cause | Typical fix |
|---|---|---|
| Spout tip, steady drip | Worn washer, seat or cartridge | Replace the internal part |
| Base of the spout | Worn O-rings | Replace the O-rings |
| Under the handle | Loose packing or worn stem seal | Tighten or replace the seal |
| Below the sink | Supply line or shutoff valve | Replace the line or valve |
| Only when hot runs | Hot side cartridge or seat | Replace that side's part |
| Whole faucet seeps | Worn body or mineral damage | Replace the faucet |
Notice that a drip below the sink is a different problem from a drip at the spout. Treat that one as a supply leak first.
Mistakes that turn a small drip into a bigger job
The classic one is overtightening. Cranking a handle shut to stop a drip grinds the washer into the seat and scores the metal, so the next washer drips faster. Stop turning when the water stops.
The second mistake is forcing a cartridge. Corroded cartridges can lock into the body, and prying with the wrong tool cracks the faucet. If the cartridge will not budge after steady, gentle effort, stop.
The third is buying parts by guess. Brass looks the same across many sizes, and an almost-right cartridge leaks within weeks. Bring the old part, or note the maker name stamped on the faucet body.
Repair the faucet or replace it
Older faucets can be rebuilt many times, but at some point a new fixture is the sensible move.
A repair is reasonable when
- The finish and body are in good shape
- Parts are easy to find for the model
- Only one internal part has failed
- The leak started recently
A new faucet is smarter when
- The body is pitted, cracked or crusted
- You cannot identify the maker or the parts
- The drip returns after repairs
- You want a different style or spray feature
If you decide to swap, a plumber's faucet repair or replacement visit includes new supply lines and valves when the old ones are worn.
Quick Answers on Leaky faucet repair
The seat inside the faucet may be pitted, or the washer may be the wrong size. A rough seat chews a new washer fast. Reseating tools exist, but for many people replacing the faucet is the easier fix.
Yes. A steady drip adds up over weeks, and it often goes unnoticed. The EPA's WaterSense program says household leaks can waste nearly 10,000 gallons a year across the home.
A slow drip at the spout is not. Water spraying or running under the sink is urgent, so close the small valve below the fixture. If it will not shut, close the main valve and call the 24/7 line.
Count the handles and feel the motion. Two handles that turn many times are usually compression washers. A single lever or smooth quarter turn is usually a cartridge, ball or disc design. Removing the handle confirms it.
Kentucky's 815 KAR 20:050 says repairing leaks, cocks or valves does not need a permit, so a homeowner can do a simple repair. If the leak is behind the wall, or you want help, a plumber with leak-finding tools can trace it.